I started doing it in early May this year and it is something you have to practice and get better at doing!
So here's how:
1. Well to start you need some henna (mehndi) paste! So, you can either buy it or make it. So far, I have always bought it but I do want to try and make some soon. If you want to make your own, here is a recipe. If you want to buy it the easiest place to get some is in Camden, there are many shops and stalls which sell it. You can also buy Henna online. I have done both, and they've all been fine! You can buy it in different containers but I have always had the cones.
2. Now you need a design. I like to Google, Instagram or Pinterest search henna patterns for inspiration and then make my own design up as I go.
3. It's pretty simple to do once you get started. Just draw your pattern on whilst evenly squeezing the paste out of the cone and onto the skin. It will come out as a brown paste, all you have to do when you're finished drawing it leave it to dry. Wipe or peel it off once it is completely dry and is starting to flake, I tend not to wash it off with water as it can make it fainter if you wash it too soon.
4. Just care for it and it will last a couple of weeks or so. It will be very orange coloured at first, but overnight it will go more brown-ish. Moisturise it regularly and rub lemon juice in it if you want it really dark.
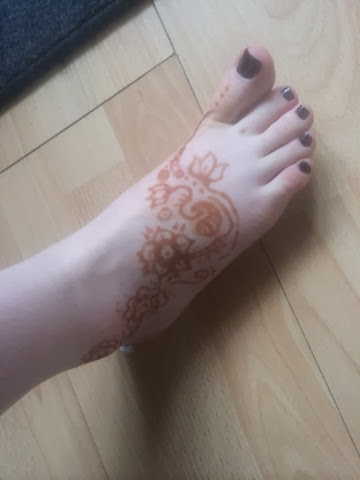
This is a photo of my most recent Henna which is on my foot. I think Henna tattoos look best on hands and feet, BUT then... there is always the option of a good moustache....!

No comments:
Post a Comment