Wednesday, 24 July 2013

DIY: Dip Dye and Studded Denim Shorts


 Aloha! Summer is finally here and it is ACTUALLY sunny, in England (whoa... I know right!) So let's celebrate with some ombre shorts!

A while ago I bought these plain denim shorts in Primark and I think they were about £5 or £8... It was difficult to find a pair in Primark that weren't already bedazzled....but I wanted to get some cheap shorts so if I completely messed it up and ruined them then it wouldn't matter too much.

I started by dip dyeing the bottom of the shorts by soaking them in bleach. It took ages to work, but to do it I put them in a bucket with some bleach (just the normal stuff you buy in supermarkets) and a little bit of water mixed in. I left them to soak for a long time as it didn't seem to be lightening them at all (probably because the denim of my shorts is so dark) I took them out and left them to hang overnight and washed them in the washing machine in the morning (wash all the bleach out or it will damage the denim)
I would say to make sure it works, don't be afraid about the amount of bleach you need to use because I tried it once and put waaayyy too much water in the solution and it just made my shorts verrrryy soapy....
In the end, I am really happy with the ombre effect because it fades really well from white into light blue and then dark blue which looks really cool (I wanted them like that, rather than like white then straight to dark blue so I let them soak in bleach for a bit before pulling them out slightly to let the ends soak for longer to get them like this) Also, bleach does run in fabric so put the shorts into the bleach like an inch below where you actually want to lighten.

I then decided to add studs to them. I ordered these from eBay and I got 100 pyramid ones for £1.25 and 50 star shaped studs for about £3.00. They're really easy to use, you just push them in and bend the rivets back so they are secure. It was hard to push them through the thicker parts of denim like where the pockets have been edged but overall it was okay. I decided to line the front pockets and make a curved line along the back pockets with the pyramid studs and put 5 little stars on that weird pocket inside the right front pocket (what the hell are you supposed to put in that pocket!?) and I put 4 stars along one of the curves on the back pocket.


Et voila! They are done! And once I had worked out that you need more bleach to whiten shorts than you do to clean them...then I had some pretty snazzy dip dyed and studded denim shorts!


Saturday, 20 July 2013

Blog Giveaway: Manicure/Pedicure Set

YAYYYY! A BLOG GIVEAWAY! Now as we all calm down a bit, let's take a look at the prize....

Up for grabs is this electronic Manicure & Pedicure set which is in a pretty snazzy purple colour! It has all the filing and buffing whatsits so you can do everyones nails all profesionally! 
It comes with the handle as well as all the attachments and the purple case which has a nail dryer on the side, also included is the plug to charge it and an instruction booklet.


To enter (and make us verrrryyy happy people) just follow us on twitter @SBARSfashion and click our "follow this site" button to follow the blog! We'd be very grateful and you'll have a chance of winning this lush nail set! Also, if you recommend the giveaway to a friend, you will be entered into the prize draw again! But you should find all this technical stuff below where you can enter the draw!

UK residents only please, due to postage costs

So go for it and GOOD LUCK!


a Rafflecopter giveaway

Thursday, 18 July 2013

OOTD: Let's go to the beach 'each!

We spent Tuesday sunbathing at Southend's beach and making the most of this AMAZING heatwave!
Not that the whole experience was as relaxing as it sounds....we decided it was a good idea to attempt to walk out to the sea whilst the tide was out and had to trudge through quicksand and sharp rocks which was disgusting and painful but we were proud when we got there! :') Not to mention that a Rossi's ice cream did kind of make it all better....
Anyway, this is what I wore for the day...

~Shorts: Forever 21
~Top: Primark
~Bag: M&S
~Sandals: Forever 21
~Hairband: Primark
~Sunglasses: Forever 21
~Belt: Primark

I bought these minty green shorts with pink ice creams on a little while ago in Forever 21 and really loved them because the pattern is fun but they also have a really good shape to them and were so comfy to wear! I was unsure of what to wear with them at the time but I had bought sandals in the green colour and pink sunglasses on the same day so I was just stuck on what top to wear. In the end, I went for this oversized white t-shirt from Primark (it is actually supposed to be tight but I bought it in a bigger size to wear it loose) I decided to accessorise the outfit with a pink handbag from M&S and a pink flower headband that I bought to wear to prom which is from Primark. And to finish it off wore a skinny pink belt with a gold bow on the front which I am pretty sure is from Primark, but it may have been New Look!

Thanks for reading and hope you enjoyed it!

Friday, 12 July 2013

How to Make: Fabric Flowers

This is a bit of a different post, but I love textiles and making clothes and things so this is all about how to make fabric flowers. There are a few different styles of fabric flowers you can make, I do prefer one type both for its simplicity to make but also its aesthetic effectiveness once made, but try them and decide for yourself!

Flower One: Layered Fabric Flower
difficulty rating *
what you will need: fabric, hand needle, thread, scissors, lace is optional
how to make it:
  • cut 10 evenly sized circles from your fabric
  • if you have chosen to include lace then cut 10 circles from this fabric as well
  • if you have chosen to include lace place each of your lace circles over the top of one of your circles of plain fabric, so you now have 10 circles
  • place two fabric circles on top of each other
  • sew a single hand stitch through the middle of the fabric to attach them to each other
  • now fold two of the circles in half and place them, folds facing together on top of your flower so far
  • sew a single hand stitch straight through the middle again
  • again fold two of the circles in half and place them folds facing together at 90 degrees to the last circles added on top of your flower
  • of course, attach them with a stitch through the middle
  • fold your remaining four circles into quaters by folding them in half twice
  • place them onto your flower all next to each other
  • attach them with a stitch straight through the middle
  • pull the "petals" up with your fingers to give it a full look


The steps sound complicated but when you actually do it, they aren't! Hopefully the pictures help, it is pretty simple! Also, personally I think lace looks really good on them and I usually use it. One important thing to remember is to use a fabric that does not fray as the flower will have raw edges, or else you will need to satin stitch (very close together zig zag stitch on sewing machine along a raw edge on fabric to prevent fraying)  the edges of the material before making the flower.


where to use it: these flowers look so pretty and you could try making really tiny ones with less circles and using them together in groups to decorate textile items, I think that would look really good! But in general you could use these anywhere you want, they look really good on clothes such as dresses or as corsages on lapels. They even make great add-ons for hair accessories or prom corsages and dresses! The uses are endless!

Flower Two: Daisy Flower
difficulty rating: **
what you will need: fabric, scissors, a button, hand needle, thread
how to make it:
  • cut six evenly sized squares
  • take one square and fold it diagonally in half once to form a triangle
  • and fold it again half, it should still make a triangle
  • and fold it over once more
  • fold the edges downwards, so that it looks like a little daisy petal
  • make sure the bottom of the petal is even by cutting off any excess fabric
  • thread your needle and sew a stitch straight through the bottom of the petal, making sure you go through all layers at once
  • repeat for all your squares of fabric, sewing the same piece of thread through them all so they are joined in a long chain
  • take the last petal around to the first, pull the thread tight and sew back through the first petal. Tie a knot in the thread, the petals should be joined in a circle and look like a flower
  • sew a button straight onto the middle, covering the hole
Sometimes it can be difficult to make all petals identical so it might take practice. Different sized fabric squares will make different sized flowers which will require a different number of petals to make, but 2inch squares should make a 6 petal flower.


where to use it: this flower has a simple and typical look, try making it with white fabric and a yellow button so it will look exactly like a daisy. It is perfect for textile items for kids like quilts or soft toys.

Flower Three: Suffolk Puff
difficulty rating: *
what you will need:  scraps of fabric, a button, hand needle, thread, scissors
how to make it:
  • cut a circle at the desired size from your fabric
  • sew a running stitch (plain in and out stitch) using your hand needle and thread, all the way around the edge of the circle
  • remove the needle and pull one end of the thread, gathering the fabric into the middle of the circle
  • you know have a puff shape with a hole in the middle. The last step is simply to sew a button or bead into the middle of the puff to cover the hole


where to use it: this could be used to decorate a variety of homemade textiles, primarily furnishings such as cushions or wall hangings.

~*~*~*~*~

Fabric flowers are a simple embellishment to make and obviously a good decorative technique for any garment. They can even be a way to cover a fault in a dress such as an irrepairable hole. My favourite is 'Flower One: Layered Fabric Flower' as they are quick and fun to make and look really snazzy once done and so have many uses. They look like a lot of work but in fact are very simple! Just remember to opt for a fabric that does not fray or else you will need to satin stitch the edges to prevent fraying! I hope you try some of these flowers and have fun doing it, there are more methods of making flowers but these are common and simple ones with a variety of uses. Go Go Go....Sew Sew Sew!

Prom Dress Diary 4: decoration

So now I had my prom dress put together, it was time to for decoration, which is the part I was most excited for!
Generally, I didn't want to go too over the top on decorating it but I was following the theme of pink flowers and silver glitter. I saw one of these really pretty cherry blossom trees and every time I saw it, it just reminded me of my prom dress :)


So to decorate my dress I.....


  • Sewed long silver beads along the edge of the lace cutout (I did have these beads around the neckline before I put the lace cutout panel on the top but I took those off)
  • Attached the embroidered tulle that I bought around the hem on my cotton skirt and let the glitter tulle layer of my skirt hang over it
  • I sewed a thick ribbon all around the waist which I wore tied up at the back
  • And finally, I made my corsage. This was actually my favourite part, it was fun just to make a little thing


My dress was done (pretty much) If I'm honest I did turn up at Louise's house a couple of hours before prom with a needle and thread still sewing my dress (just finishing it off!) But at least I had it all done before prom actually started!


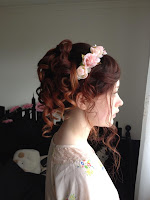
This is my dress completely finished just before we left for Prom. I wore silver glitter heels and had my hair in a curly updo with pink flowers in it. I ordered a sliver clutch bag but it never arrived...WAAA D':


After I put my dress together, I noticed that it looks a lot like a Princess dress I used to have when I was little...so here is a bit of a throwback for ya!
I didn't intend to make a dress that looked like my old one at all and I only realised it when I'd nearly finished my dress and I saw this picture of me when I was little so it was just really weird when I noticed how similar they actually are!


Also, prom was actually a lot better than I expected it to be. It was a fun night and we both liked it, so that was good!


Prom Dress Diary 3: construction

Prom was a couple of weeks ago now, but I haven't had much time to write about my dress since then so now, here is me making the main part of my dress!


Okay so to start as I didn't buy a dress pattern to make my dress from I used the black crop top that I bought as a guide for a shape to make the top of my prom dress. So I cut the pink cotton to the shape of the top and cut pink lace to make the back. I sewed the top together with double stitched seams so they were strong as I wanted to make sure the lace would stay in place. I sewed the edges of the neckline and armholes. I used hook and eyes as fastenings on one arm.
Next, I cut the pink cotton by eye to make a long skirt and sewed plain seams down the sides. I then sewed the glitter tulle netting round in a circled and placed it over the cotton with pleats to make it fit the cotton. As I wanted the skirt of the dress to have some shape to it, I gathered it at the top before sewing it onto the top of my dress. I cut the cotton and tulle netting to the correct length and hemmed the cotton.

After I had done all this, I actually decided that I didn't like the neckline of the dress as it was so high and with the long skirt it just looked a bit too much, so I decided to cut a sort of hourglass shape through the middle of the top and inserted lace in the cutout space.

This was basically how I put my dress together and I have one more post coming on how I decorated it <3

Monday, 10 June 2013

OOTD: This Girl is on Fire

Yo! I have been doing way too much blogging lately for someone who should be revising for exams! But hey, what can ya do, eh! I might as well carry on with another outfit of the day!
About a week ago, Louise won tickets for us to see Alicia Keys at the O2 which was cool, and most exciting of all, it was an outfit oppertunity! (as sad as that sounds, it really did excite me!)
Sooooo this is what I wore to the concert.....

For someone who is not a big fan of pink, I seem to be wearing every shade imaginable!
Anyway...
The dress:  is from the kids section in Primark and I think it cost £8
The reason I decided to shop in the kids section was because things like skater dresses are always just a bit too long on me, so I thought I'd try shopping in the kids section and decided to try Primark first. That dress was the only one that I liked and so I bought it....and I think it is 10-11 years. Great to know I am the height of an 11 year old.... :') Plus, kids clothes are cheaper!
The shoes: are black strappy heels with cork platform and pink trim. They're from Boohoo and are £25. They are so easy to wear and walk in because the platform is quite big compared to the height of the heel. They are comfy and didn't hurt, even after I had them on for hours. Definitley recommend them :)
The accessories: The bag was a birthday present and my blog about it is here: http://sparklybluesandrainbowshoes.blogspot.co.uk/2013/03/handbag-heaven.html . I also wore beauty UK pink nail varnish on my fingers and tootsies in 'No.31 Neon Pink'. And skin coloured tights from Tesco, THEY ARE THE BEST NUDE TIGHTS! Always buy them in Tesco! And now I've calmed down about tights...the skinny silver belt is from New Look and the lipstick is from e.l.f in 'sociable'

That's it then! The concert was good, as we're not the biggest Alicia Keys fans we swayed along to the songs, then left a bit early for Starbucks hot chocolates!

Monday, 3 June 2013

Start of the festival season: Coachella fashion

As summer is finally here, that means there will be lots of festivals in the next couple of months soooo I thought I'd start it off with the celebrity fashion at American festival Coachella (I know it was a couple of months ago but hey!)
A lot of celebs go to Coachella and it looks AMAZING sooooo to celebrate the start of summer and festivals to come here is some festival fashion!

Katy Perry
Selena WERKED it
Katy wore a floral crop top, big black sunglasses and quite an unusual skirt! Personally, I love the top however Selena Gomez wore the same top to an event, with an orange bodycon skirt and looked amazing! And as much as I really love Katy Perry, I have to admit that I prefer Selena in the top as I loveeeee Selena's outfit so much...the skirt went far better than Katy's. To be honest I dont think the outfit does anything for Katy's body, the skirt isn't flattering at all.


Vanessa Hudgens
....appears to be wearing her Nan's underwear to a festival...! Her big curly hair does look nice with the dark rose headband but that's just about all she got right.... The dark lipstick is too strong for the summer and her John Lennon-esque sunglasses just don't work with the outfit.


Lindsey Lohan
Well she was so desperate to go to Coachella that she postponed rehab...so you'd hope she made an effort for it! Lindsey Lohan wore a short, fitted white dress which did quite suit her, it was simple and pretty. Also, her bag and sunglasses were both very nice (although she has two pairs of sunglasses...theyre both nice!)


That's it for Coachella celebrity fashion!


Outfit of the Day

After just posting a summery OOTD, I'm going back to a more wintery and realistic of British weather outfit -it even rained the day I wore this...typical!
sooooo what I'm wearing....
*a black bowl hat I got online
*a black and pink top with swans on it (h&m)
*a pink faux leather skirt (h&m)
*black worker boots (barrats)
*black/pink/white patterned tights (river island
*black leather jacket (littlewoods....yeahhh I've had it ages...)
*black belt (h&m)
*pink bag (m&s) which isn't actually in my pictures...

I wasn't sure whethere or not to wear the hat, before I left the house I kept taking it off and putting it on again but in the end I wore it, and it did come in handy when it rained! :')


                       Dont fortget to follow us on instagram! SparklyBluesAndRainbowShoes
                                               http://instagram.com/p/aGsFFKyZqW/

Outfit of the Day...and Yay for the first sunny bank holiday ever!


that's me, demonstrating my...erm....swag?

This is my OOTD from last Monday which was SUNNY!!! WOOOO! Unless you live in England, you probably won't understand how amazing this moment was but...it was seriously like the first EVER sunny and fairly warm bank holiday!
So i took full advantage of the rare oppertunity to wear a summery outfit and it felt so good! :)

I wore.....
a flowery crop top from Topshop (it is actually a pyjama top but it's waaayyy too nice to wear to bed so yeah I wear it out!)
my denim jacket is from American Eagle (I have blogged about it before: http://sparklybluesandrainbowshoes.blogspot.co.uk/2013/03/denim-jacket.html )
floral bodycon skirt with a zip down the front from H&M
flowery box bag from Primark
and nude coloured loafers from Next

I actually liked this outfit once I had it on but I sort of just put random things together and changed a few bits as I was going along until I got to this. It is unusual for me not to have things match each other's colour and pattern cos I am like obsessed with matchy-matchy things! But I sort of broke away from that a bit (for me) and in this case, I liked it :)
Yep...I look quite excited about my loafers!


Dirty Works Face Mask

Dirty Works detox face mask claims that it will leave your skin "fresh and glowing" and it sure doesn't disappoint!
I have used it a few times since I bought it...you just apply some all over your face and let dry for 10 minutes before washing it off....it really is a quick fix like it says on the bottle
After using it, my skin felt soft and clean although it was a bit drier than usual, but after moisturising it was fine :)
I would definitely reccomend this product and I'd love to try the other masks from the same range....the Moisture Mask and the Brightening Mask!

Dirty Works always get it right...from the packaging to the product everything is perfect :)

There's me and my mum trying it out! :)


Thursday, 11 April 2013

OOTD: "No money, No family, 16 in the middle of Miami!"

My outfit for today's "Outfit of the Day" is actually now my assigned job interview outfit, and a very affordable interview outfit too, costing £13 for this little blue dress from Primark. 
The title of this outfit of the day is actually some song lyrics I've had stuck in my head for like the last week: "Work" by Iggy, so I thought why not put it as the title of this post especially as the "no money" part is quite appropriate right now after buying way too many clothes and tickets for festivals. *I regret nothing* And if you also have no money like me, for one I feel for you and two this dress is so cheap and so suitable for so many things even the "poor" (like me at the moment) can afford it! 


I've also seen this dress in quite a bright pink which looks quite nice too, the length is slightly short on me but I am 5ft10 so that's just normal for me. As far as sizing goes I am usually a size 8 but when in the shop they only had it in size 6 or 14+ so I just bought the size 6 anyway and thank goodness because of the stretchyness of the material its fits (that's the problem with Primark if you don't get there on the morning of their stock delivery all the size 8/10 and 12's are usually gone).
I would suggest that everyone should go and buy this dress as its cheap, will suit all figures, stretchy so is quite slimming, a nice colour and length, good for all weathers and plus you save £7 if you buy this dress instead of the almost identical Topshop one.

Tuesday, 9 April 2013

Review: Soap and Glory: The scrub of Your Life

So for Easter instead of getting an Easter egg from my parents, I got to choose a soap and glory product instead after being completely won over by their amazing facial scrub I purchased earlier this year. After scanning the shelves in Boots I chose "The Scrub of Your Life" (a rather bold statement which in the end it did in fact live up to).  Soap and Glory always manage to smell lovely, look pretty and feel amazing while being affordable and lasting a long time, and this Scrub surely doesn't disappoint.
For £7 for 200ml this product has the quality of more luxurious and expensive body scrubs on the market paired with a very affordable and competitive price. 
The thing I love most about this product has to be the smell, it smells almost fruity and sweet and girly all at the same time and after using it you just can't help but embrace how great you smell. The actual scrub is a light pink gel with dark pink small grains inside, the grains give it quite a rough feel although it still feels relaxing and like the scrub is working. After using the scrub my skin was noticeably softer with less dry and flaky skin especially on my knees and elbows, although recommended to use only once or twice a week, I think I'm going to end up using this product every day just so I can smell of that wonderful fruity scent every day!

I would definitely tell anyone and everyone to go and buy this scrub immediately as like the name it is "The Scrub of Your Life"!


Shaping Your Eyebrows

I usually have my eyebrows threaded but I actually haven't done in a while so I have been plucking them; which I actually hate doing but what can ya do! Threading does hurt but for me only as much or less than plucking and the results are totally worth the pain; my eyebrows always look so much better after threading and they shape them much better than I can ever pluck them.

As for filling in eyebrows, I used to do it sometimes with powders but I wasn't very good at it, my brows were sometimes uneven NOT A GOOD LOOK. I think everyone knows that eyebrows should be sisters and not twins, but it isn't at all attractive when they're distant cousins! Personally, I find it really hard to fill in my eyebrows really well, so they are an even and good shape which isn't too different to my natural brow.

So, I tried these EyeBrow Shaping Stencils from elf.com. They cost £1.50, so I thought I may as well "guinea pig" them!

So they are really straightforward, you just have to put one up to your face and fill the open area in with a powder or pencil, flip the stencil and do the same on the other side. There are four shapes to choose from and I tried two of them, I tried "full arch" and "structured arch" They are good for me as I find it difficult to fill my brows in. I needed to touch them up a bit after using the stencil, I had to make them slightly longer but for the basic shape they are really good and soooo quick to do!
Remember when filling in your eyebrows to line them up with your face, use a pencil to align them with your nose and make sure the start of the brow is in a direct straight line with the edge of your nostril and angle the pencil to check the brow ends in line with the outer corner of your eye and back to the nostril

These pictures show the process and result. Sorry about the stupid faces I am doing in some of them, I don't know whats wrong with me but as soon as anyone gets out a camera I seem to feel an urge to pull millions of pointless faces and pretty much hand out mugshots!

But definitely try these, they are so cheap and do help if you find getting an even shape difficult!

Trend: Comic Book Print

POW~~~~BOOM~~~~ZAP

Comic book print has been really popular since the new year and all the high street shops like Topshop have had loads of stuff in this style

 
One of the pieces in this style is this bodycon skirt from Topshop with animated words on it
Then the other comic trend is like an actual cartoon strip like these leggings from Polyvore.com
Personally I love this style and was happy to find all these clothes in the last five or six months!
~~~~~~~~~~~~~~~~~~~~~~~~~~~~~~~~~~~~~~~~~~~~~~~~~~~~~~~~
In June last year, I made this dress :) I had thought about a dress in a comic strip style for a really long time but then I found this AMAZEBALLS fabric on etsy.com (etsy has some pretty hawt stuff by the way!) And yeah I made a shift dress from the fabric which took me about an hour and a half in total


I wore the dress to a party and for that night I wore red shoes and made some bows out of the fabric to stick on them! I also wore these earrings from punkypins.co.uk which have a popart style face on them. Yeah, so this is the dress and me wearing it, just a post to say comic book style is coooooool and my claim on the fact I did it before Topshop so MEH!


WHOA, it's sideways...

PARTAY!


Related Posts Plugin for WordPress, Blogger...